
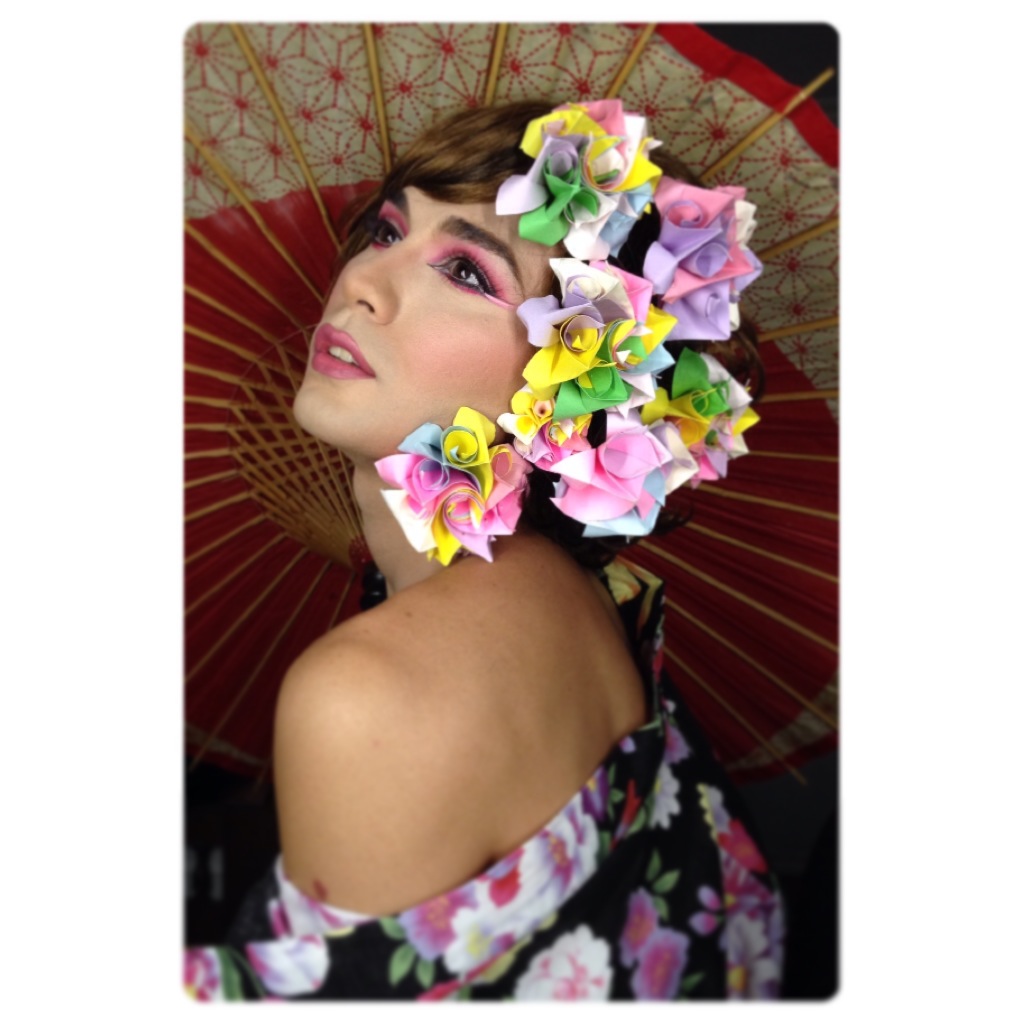
I created this look one fine day in February 2014.
I was having a free day and was contemplating on what to do. A good friend of mine was leaving for Tokyo that week. Being a Nipponphile, I was nurisng a bottle of jealousy and started watching various videos on Youtube about Tokyo and the Geisha culture to make me feel better.
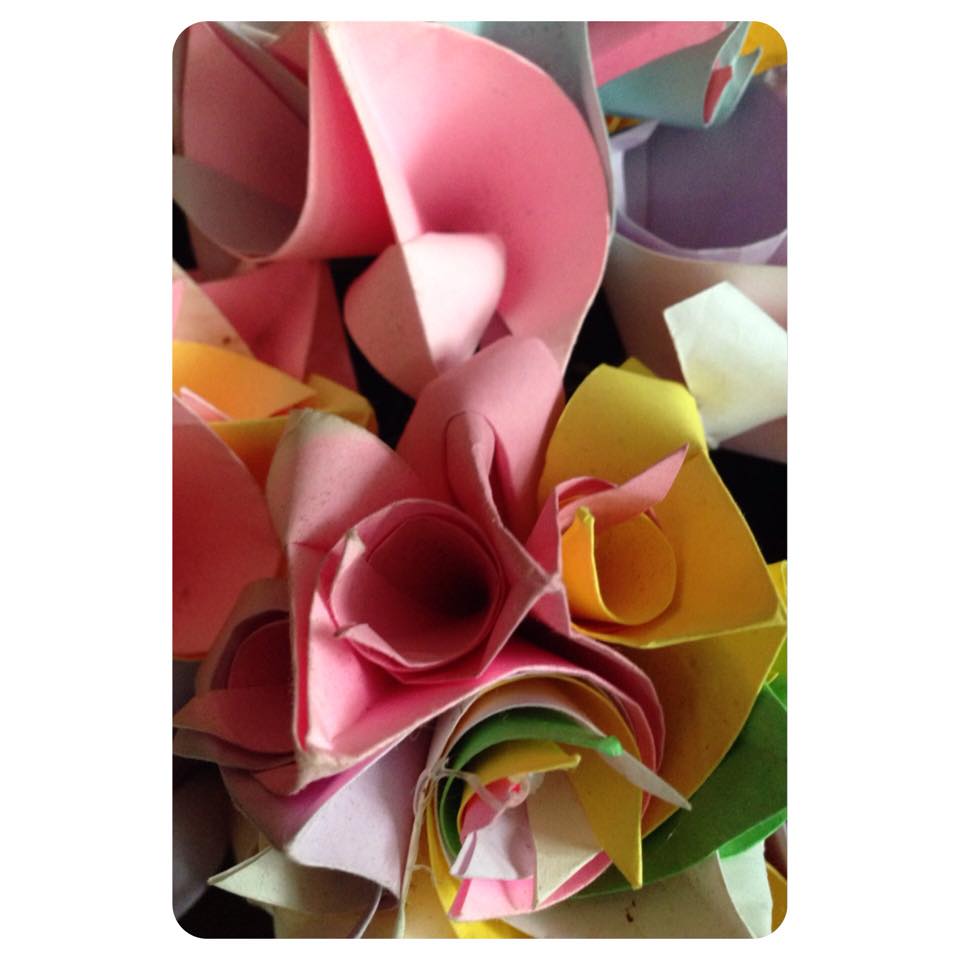
I was watching a BBC documentary entitled “Geisha Girl” (see link), when I spotted some origami flowers I made as an accessory for a costume I wore a year prior. I started to get ideas. I got my Yukata out from the closet, brought the wigs out from the boxes, opened my make-up kit and disappeared into the land of creativity.
This was a great opportunity for me to try out a few products that I purchased in Sephora when I was in Singapore a few days prior. Yes, my international readers, we don’t have a Sephora store in the Philippines as of this writing.
 To achieve this look these are the products I used.
Click on the brand names or product names to be brought to their webpage to see a photo of the product that I used.
Concealer / Camouflage:
I applied an orange toned concealer/camouflage called Secret Camouflage S4 from Laura Mercier all over the freshly shaved area of my face to counter act the blueness of my beard.
I didn’t apply concealer in my under eye because the foundation that I was planning to use will conceal any under eye darkness present.
Foundation:
For this look, I wanted to have light skin (not white) taking inspiration from Japan’s Geisha.
In a patting motion using a latex sponge, I applied MAC Fullcoverage in NC 25 in layers all over my face. More product was layered on the bearded part of my face to “color correct” the initial application of the camouflage earlier.

In the center of my face, under the eyes, on the bridge of the nose and on my chin; I applied a liquid mineral foundation that I bought from Tokyo called Integrate. This acted as my highlight.
Powder:
With a patting motion, I set the foundation on the center of my face with MAC Studio FX in NC 15 with a MAC 183 brush (currently discontinued). Once I was satisfied, with the same brush and patting motion, I applied MAC Studio FX in NC 30 to set the rest of my face.
I applied Integrate’s Mineral Powder in 00 under my eyes, on the bridge of the nose, on my brow bone and on the chin using the sponge applicator that came with the compact. Mineral powders give out a “glow”, giving you a soft defocused look.
Blush:
With a Kabuki blush brush, I applied a generous amount of Pink Blush from Mitsuyoshi Cosmetics all over my cheek bones to as far back as my hair line. I purchased these from a Kabuki store in Asakusa in Tokyo during a trip there in 2010.
Contour:
With a flat Kabuki brush, I applied Laura Mercier Matte Bronzer under my cheek bones. Initial application started at my side burns all the way to my outer lip corner. I used very little of this product, just enough to give definition to my cheeks so as not to over power the color of the blush.
I applied more of Laura Mercier’s Matte Bronze to my jaw line, blending towards my cheek to make my face appear smaller.
Using a Laura Mercier Angled Eye Color Brush, I applied FS Two Way Cake Foundation Powder in Rajah to add definition to my nose.
Lips:
I lined my lips with L.A. Colors Cosmetics Lipliner in Natural. With a kabuki lip brush from Nars Cosmetics, I applied a generous amount of lip color number 2 from Laura Mercier’s FAIR Lip Watercolor palette (limited edition: not in production).
Eyes:

I first applied an eye base from Nars. Click here to be brought to a previous blog entry about eye bases.

One the eye base has dried, with a Laura Mercier All Over Eye Color Brush, I applied a Laura Mercier’s Matte Eye color in Buttercream all over my lids.
On the crease of my eye, using Laura Mercier’s Pony Tail Brush, I added Sephora’s Colorful Eyeshadow Matte in Starlet N˙38 (my recent purchase in Singapore). I carefully blended the color beyond the outer corner of my crease and towards my brow bone as well.
Using Spehora’s White Khol Pencil, I lined my water line and extended the application beyond the out corners of my eyes for a dramatic effect. I also applied the eyeliner at the inner corner of my eyes.
I then applied a thin layer of Laura Mercier’s Ebony Cake Eye Liner along my lash line, concentrating the product between the gaps of my upper lashes. I carefully extended the eyeliner outward making sure the line is applied as thinly as possible above the white line created by the white eye pencil I applied prior. I also did this on my lower lash line.
Once the cake eyeliner was dry, I applied K-Palette’s Liquid Eye Liner on top of the lines I created with the cake eye liner.
Once that was dry, using Laura Mercier’s Corner Color Brush, I added more of Sephora’s Colorful Eyeshadow Matte in Starlet N˙38 along the lower lash line to create depth and color unity with the upper lash line. I also layered more color on the outer corners of my upper lid to add a more pop of color.
With a 3/0 Sakura Brush 555, I added a very faint line black line using Laura Mercier’s Matte Eye Color in Noir to create depth and dimension.
I then added some corner lashes that I bought in Ben Thanh Market in Ho Chi Minh City (Saigon), Vietnam.
Brows:
I used a brown pencil from Daiso Japan to define the arch of my brow. I didn’t fill my brows in , I left them as they were so that the eyes were the main focal point of the face. Click here for full description of the brow pencil.
~
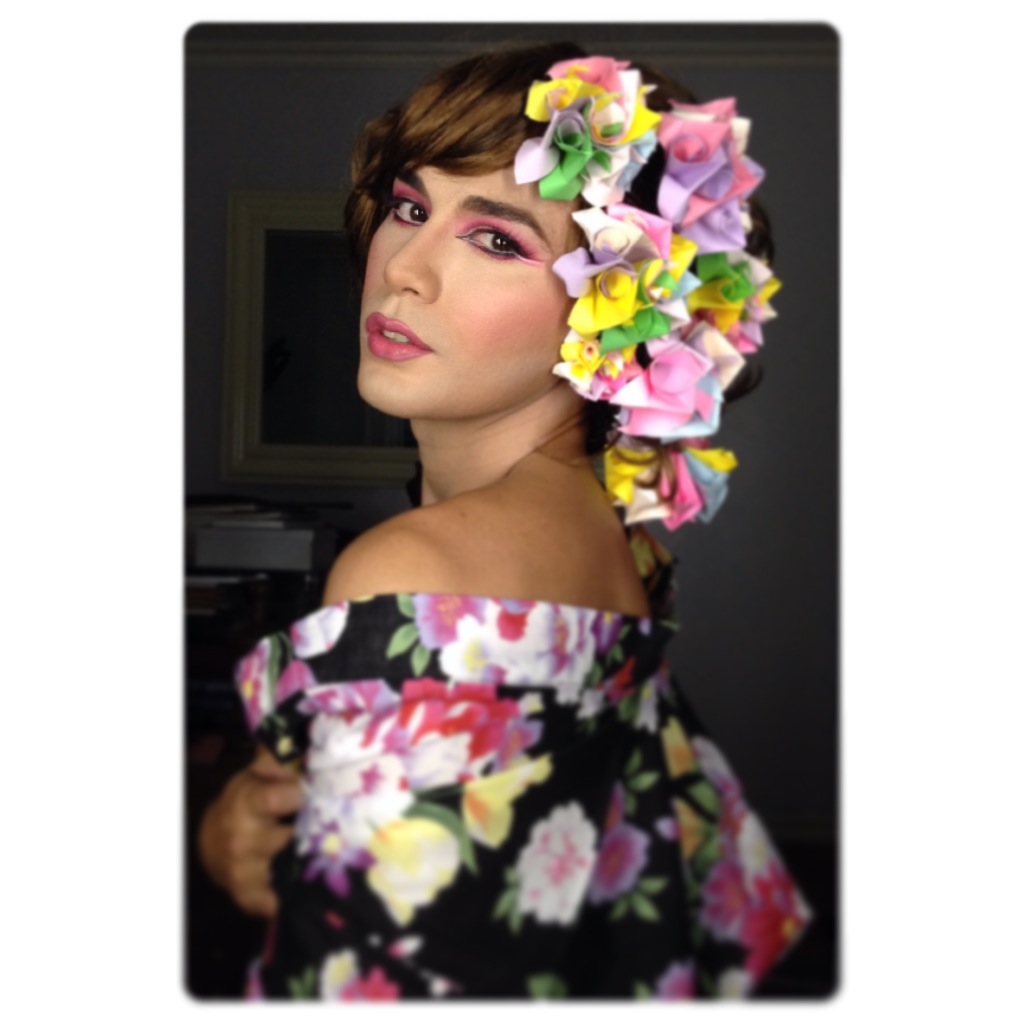
When everything was to my liking, I put on my Yukata, put on my wig and secured the origami flowers with hair pins. I settled in front of my lightbox, set my iphone on timer and shot away.

2 thoughts on “Sayuri”